

Welcome to Digital Hub™
Digital Hub™ is a modern data science platform with data science and business intelligence capabilities. The platform hosts the most advanced open-source development, visualization and alerting applications in a cloud environment. These applications are pre-configured, integrated with a database, and ready to be used. Its user friendly, collaborative, and simplified workflow enables engineers, data scientists, and their teams to perform data science tasks with ease allowing them to focus on generating insights.
Getting Started
In this guide, we will walk you through the steps you need to take to get started with Digital Hub™ platform:
-
Subscribe to a plan
-
Create a project
-
Launch your project applications
-
Connect to your existing repository
-
Access notebook templates
-
Set up your team
-
Ask for Support

Subscribe to a Plan
To get started with the platform, access platform’s applications, and start developing you need to:
-
Sign up for an account on Digital Hub™ Platform and verify your email
-
Login and on the Home page Side Bar navigate to Subscription/Pricing page
-
Choose a plan that is best for you and follow the steps to subscribe
There are three different plan options for individuals and teams and one customized plan for Enterprise. Each plan provides certain amount of usage and storage on the platform.
Academia Plan
-
40 hours of usage
-
5GIGs of cloud storage
-
Free if you are a Student or if you have a Promo code
Individual Plan
-
160 hours of usage
-
100GIGs of cloud storage
-
CAD $14.99/month
Teams Plan
-
200 hours of usage
-
200GIGs of cloud storage
-
CAD $29.99/month
Use Promotions
If you are not a student, you can use a promo code to qualify for Free Academia plan.
In order to use a promotion code, choose the Academia plan then enter the promo code in Student ID/Promo Code section.
Create a Project
A Project in Digital Hub™ is a collection of components that organize your data science development workspace.
Here is how you can create one:
-
On your Home page, navigate to Develop/Create Projects on the Side bar.
-
Select the type of project you want to create.
-
Currently you have two options to pick from: Data Exploration and Machine Learning Project.
-
-
Choose your Toolkit
-
Based on the project and type of analysis you can choose from 3 different applications to add to your project. JupyterLab, Superset, and Grafana.
-
-
Add team members
-
This option is available only if you are subscribed to a Teams plan.
-
-
Pick a Name, add a Description, and Tags for your project and click Create.
-
Tags will allow you to search for projects and quickly find them.
-
-
Voila! You have created a project.
A Data Exploration project contains packages necessary for statistical analysis and visualization of data. A Machine Learning project contains almost all data exploration packages plus machine learning
Launch Your Applications
Go to Home page to see your projects and click on the project you just created.
On project page, you will see your project's applications are Provisioning, throughout this process the applications are being deployed into the backend and a database is being assigned to your project.
When the provisioning is done, your applications can be Started, Launched and used.

TIP: You can save your hours by using the PAUSE button. Hours are accumulated as long as applications are in Ready status, even if you are not using them or you are logged out of your account!
Connect to Your Existing Repository
You can access your existing GitHub repository following the instruction below:
-
Launch JupyterLab and navigate to Git tab
-
Select "Clone a Repository"
-
Enter the URI of the repository you wish to connect to
-
Click Clone


To get the repository URI, go to your GitHub and click "Code" to retrieve your HTTPS clone URI
Access Notebook Templates
Digital Hub™ Notebook Templates cover real world use cases in the oil and gas industry and common, repetitive data science tasks. Here is how you can access them:
-
Launch your JupyterLab
-
On Launcher, navigate to Templates
-
On the drop down, select "digitalhub"
-
You will be able to see the list of notebook templates
-
Click on the one you wish and start analyzing!

Set Up Your Team
-
If you choose to subscribe to a Teams plan, you will be able to add members to your team.
-
As the plan owner, you can create/delete projects, add/remove team members, and assign them roles.
-
Hours and storage are shared among all of the team members.
-
You can invite members to your team even if they are not subscribed to a plan.
Ask for Support
We hope that this instruction help you get started with Digital Hub™ platform and if you have questions, want to know more, or need help with anything here are multiple support channels:
-
Blogs: Great resource directly form the team who built Digital Hub™
-
YouTube Channel: We post instructional videos and webinar recording which go over Digital Hub™ notebook templates
-
How-To's: These How-To's are quick instructions for most essential operations on the platform
-
Technical Support: If you ever come a cross a problem, submit a ticket and we take care of it
Digital Hub
Digital Hub


Oil & Gas Data Science: IoT Data X-Ray
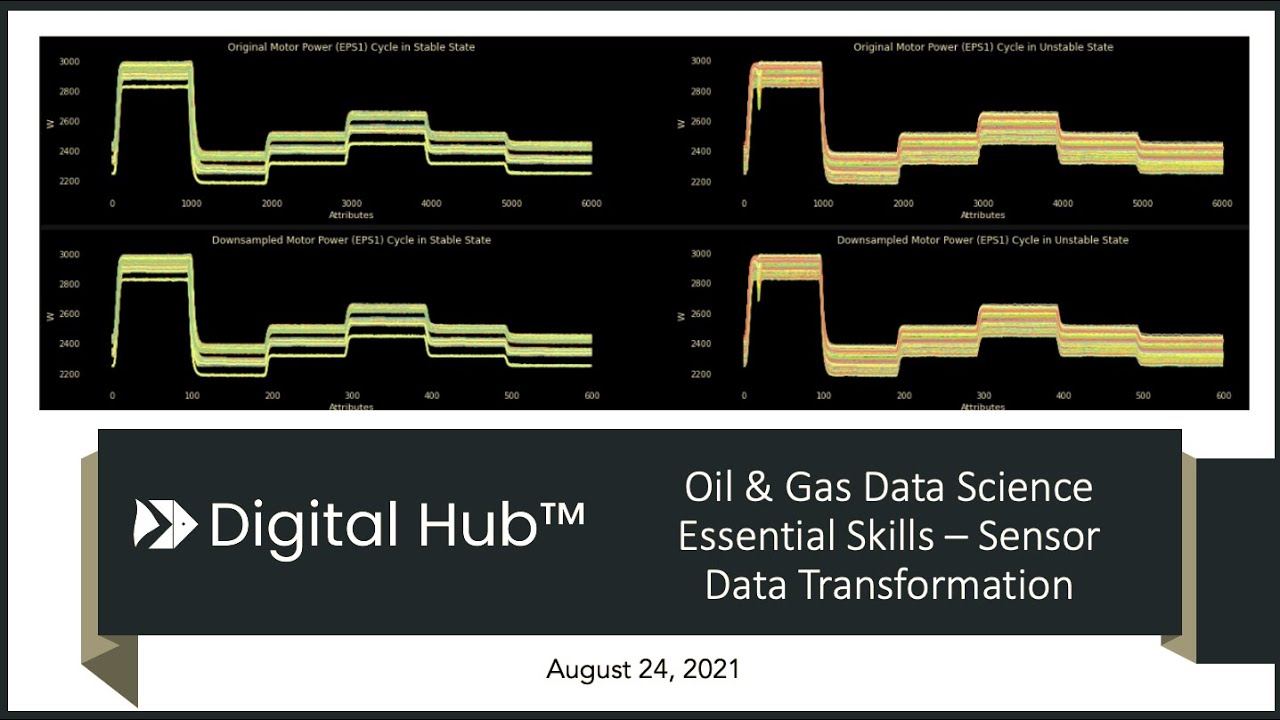
Oil & Gas Data Science Essential Skills: Sensor Data Transformation

Digital Hub™ Notebook Templates - Oil & Gas Data Science Playbooks
